Off-Network Responder
For assets not connected to your network, XDR Forensics enables the creation of a portable Responder package for running triages and collecting data. This package also facilitates the use of our live MITRE ATT&CK analyzer along with our post-acquisition analyzers, enhancing the depth and relevance of the gathered data.
You can transfer this package to the off-network asset using a shareable link, email, file-sharing services, or by physically taking it to the asset. Once executed on the asset, the collected data is returned to the XDR Forensics console that generated the package for comprehensive analysis and reporting via the Investigation Hub.
When the Responder is executed, it creates an evidence container file with a .zip extension on the offline asset.
With XDR Forensics v 4.27.6+, users can choose to encrypt the collection with a password during the off-network Responder setup process. When importing the collection zip file with the additional password back into the console, users will need to enter this password. Biunzip, a small utility we created, is specifically helpful in this scenario, aiding in the management of multiple off-network acquisitions during console ingestion.
1. Task Creation
Section titled “1. Task Creation”Create an Off-Network Task
Section titled “Create an Off-Network Task”- Navigate to the “Assets” tab in the XDR Forensics console and click on the “+Add New” button.
- Select “Off-Network” to initiate the creation of a task for devices not connected to the network.
Choose the Task Type
Section titled “Choose the Task Type”- In the second stage, select the type of task you want to perform on the Off-Network asset. You can choose between “Acquisition” and “Hunt/Triage”.
- For this example, let’s proceed with the “Acquire” feature.

Off-Network Responder: Create Task
Select the Asset(s) Operating System
Section titled “Select the Asset(s) Operating System”When creating an Off-Network binary, first choose the operating system on which you plan to execute the binary. If you anticipate needing to use the binary on multiple operating systems or are unsure which system will be used, consider generating a package with multiple binaries. This approach ensures that you will have a binary compatible with all the XDR Forensics-supported operating systems.
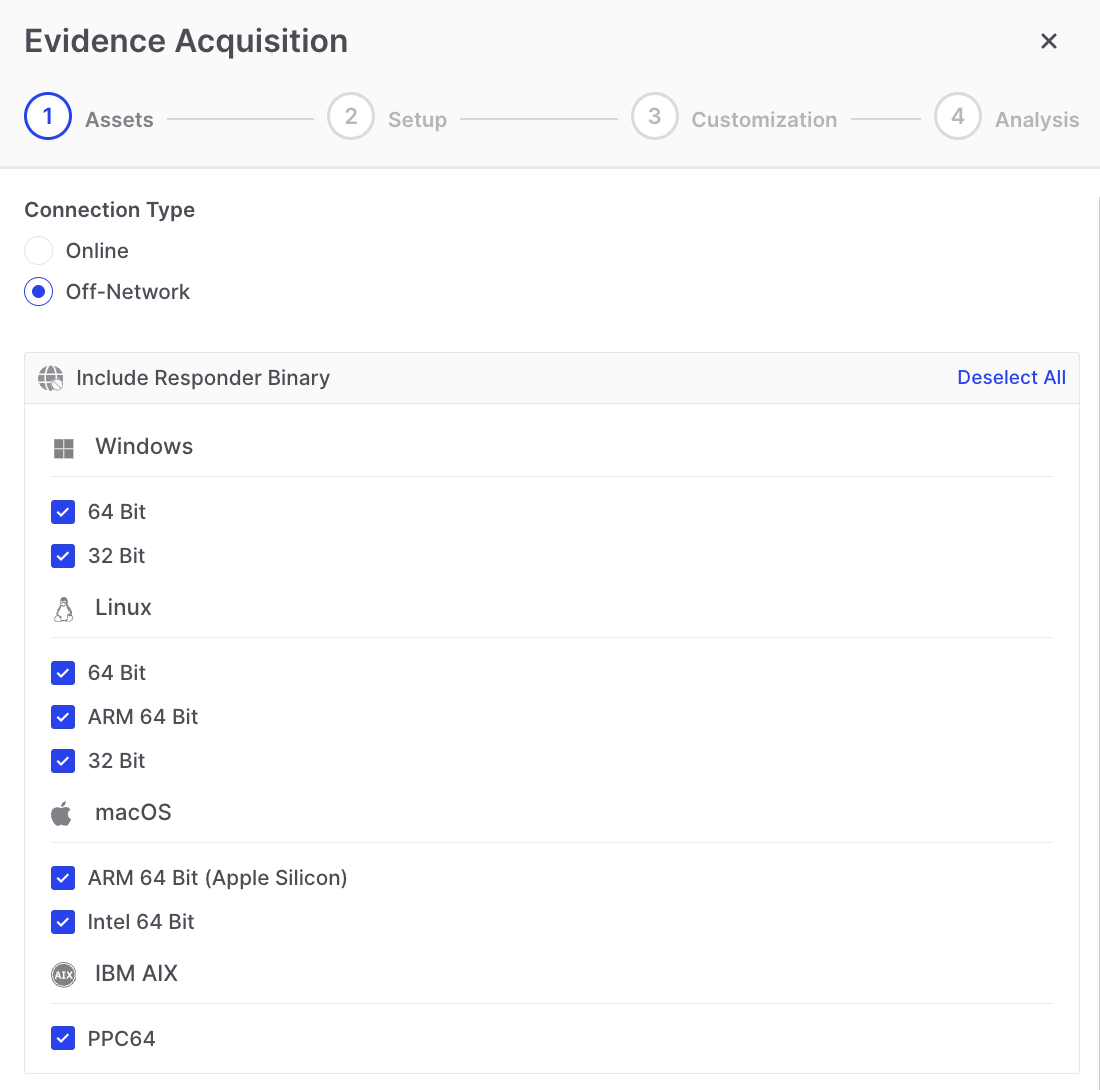
Off-Network Responder: Assets
Define the Task
Section titled “Define the Task”Specify the Task Name (optional) and Acquisition Profile (mandatory).
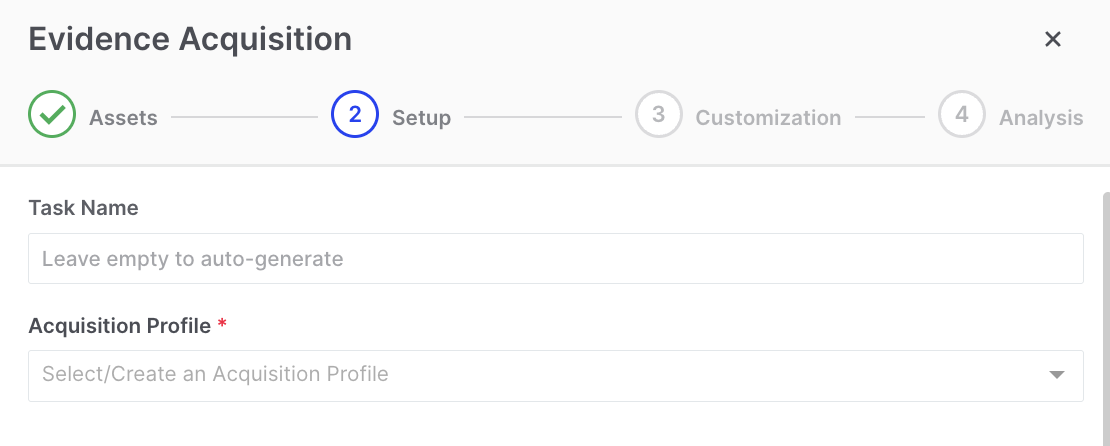
Off-Network Responder: Task Name
Customize Collection Options
Section titled “Customize Collection Options”Here, you can choose to customize the task options if you need to deviate from your organizational policy settings.
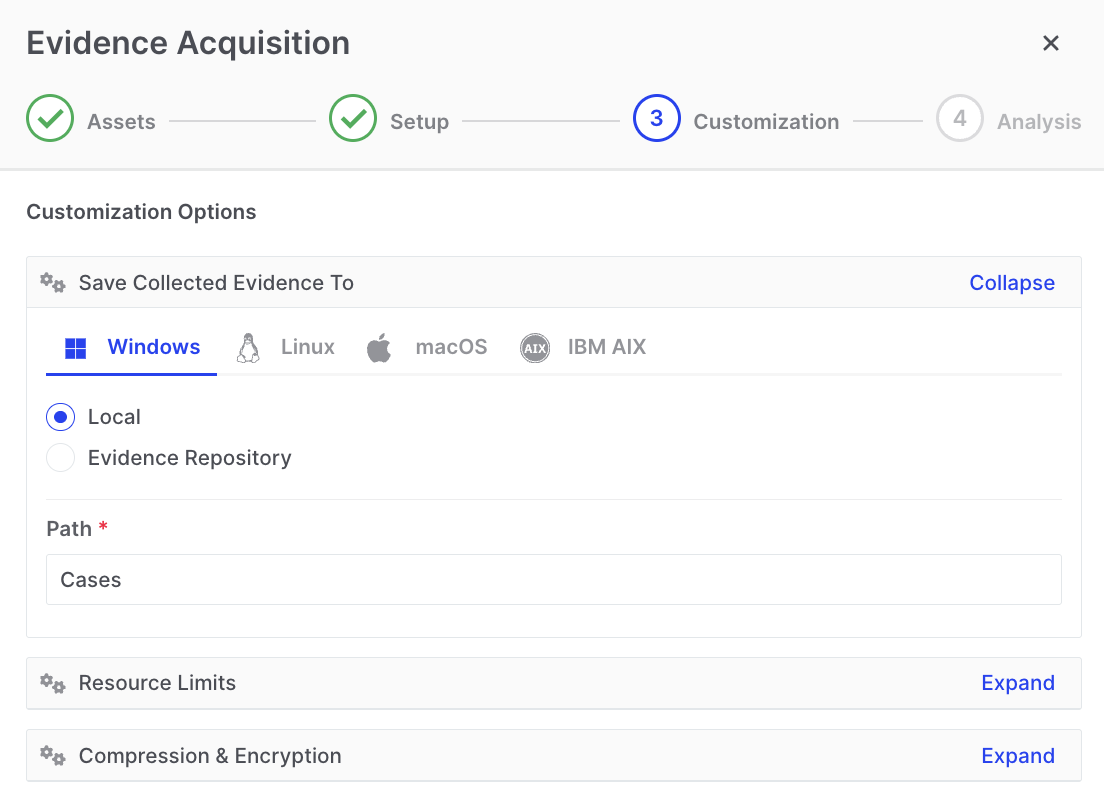
Off-Network Responder: Setup
Customization - Optional DRONE Analysis
Section titled “Customization - Optional DRONE Analysis”By default, the DRONE feature is enabled for off-network tasks. However, in the subsequent step, you have the option to deactivate the MITRE ATT&CK analyzer, as well as any or all of the post-acquisition analyzers, depending on your specific requirements.
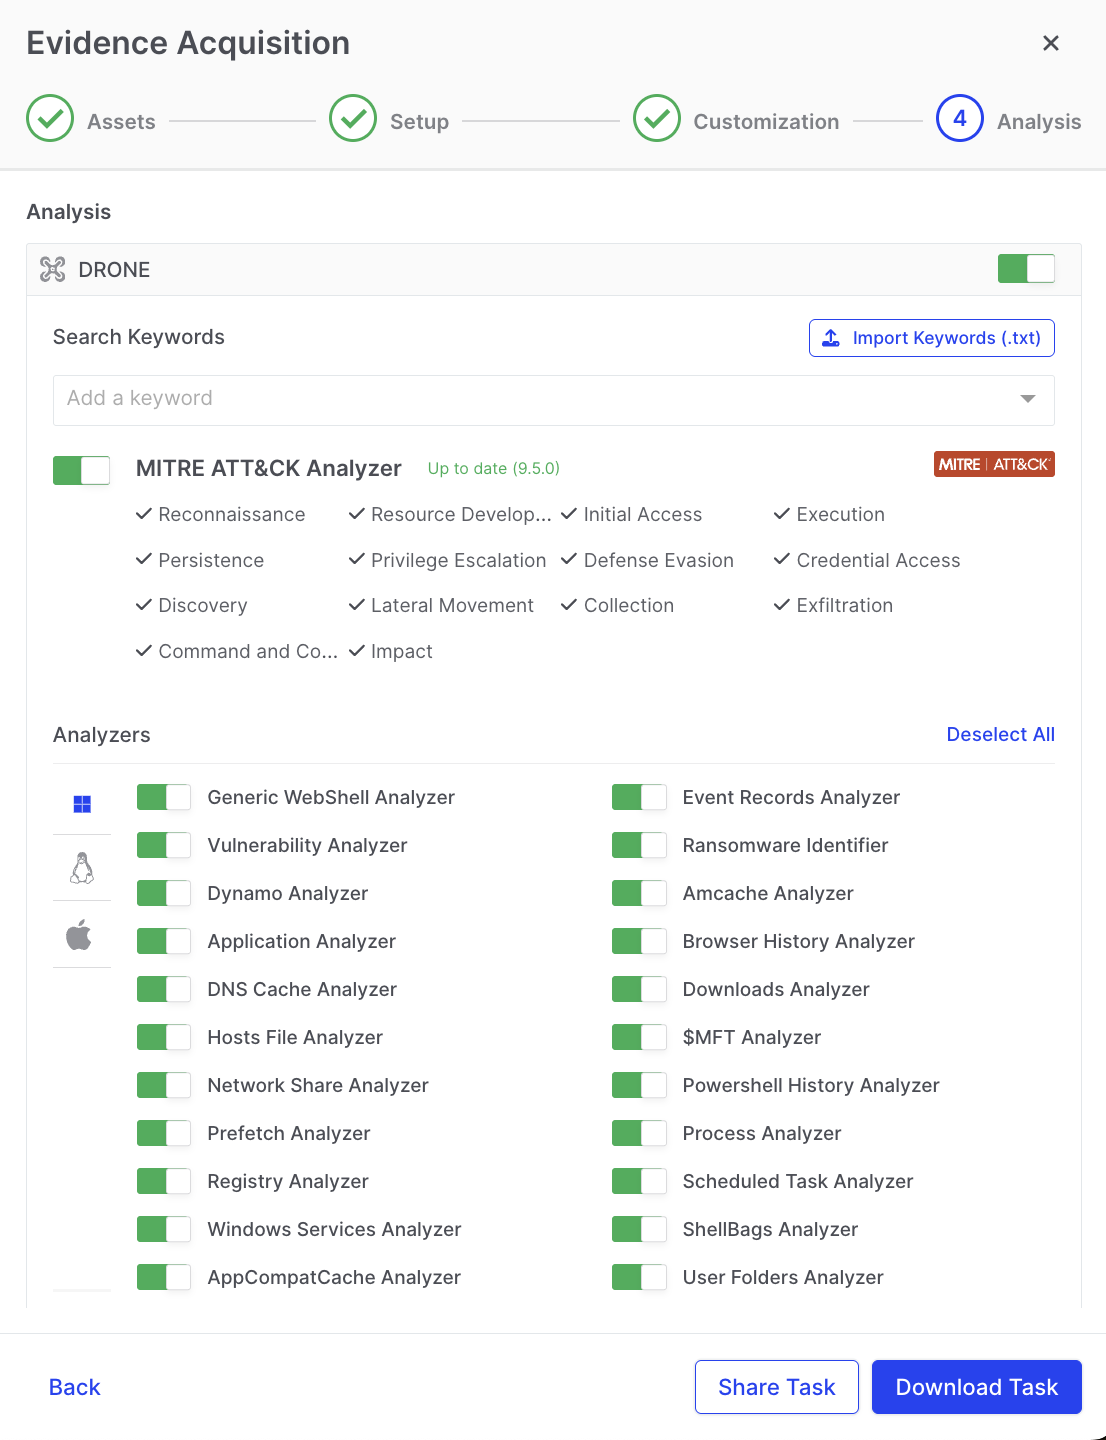
Off-Network Responder: DRONE
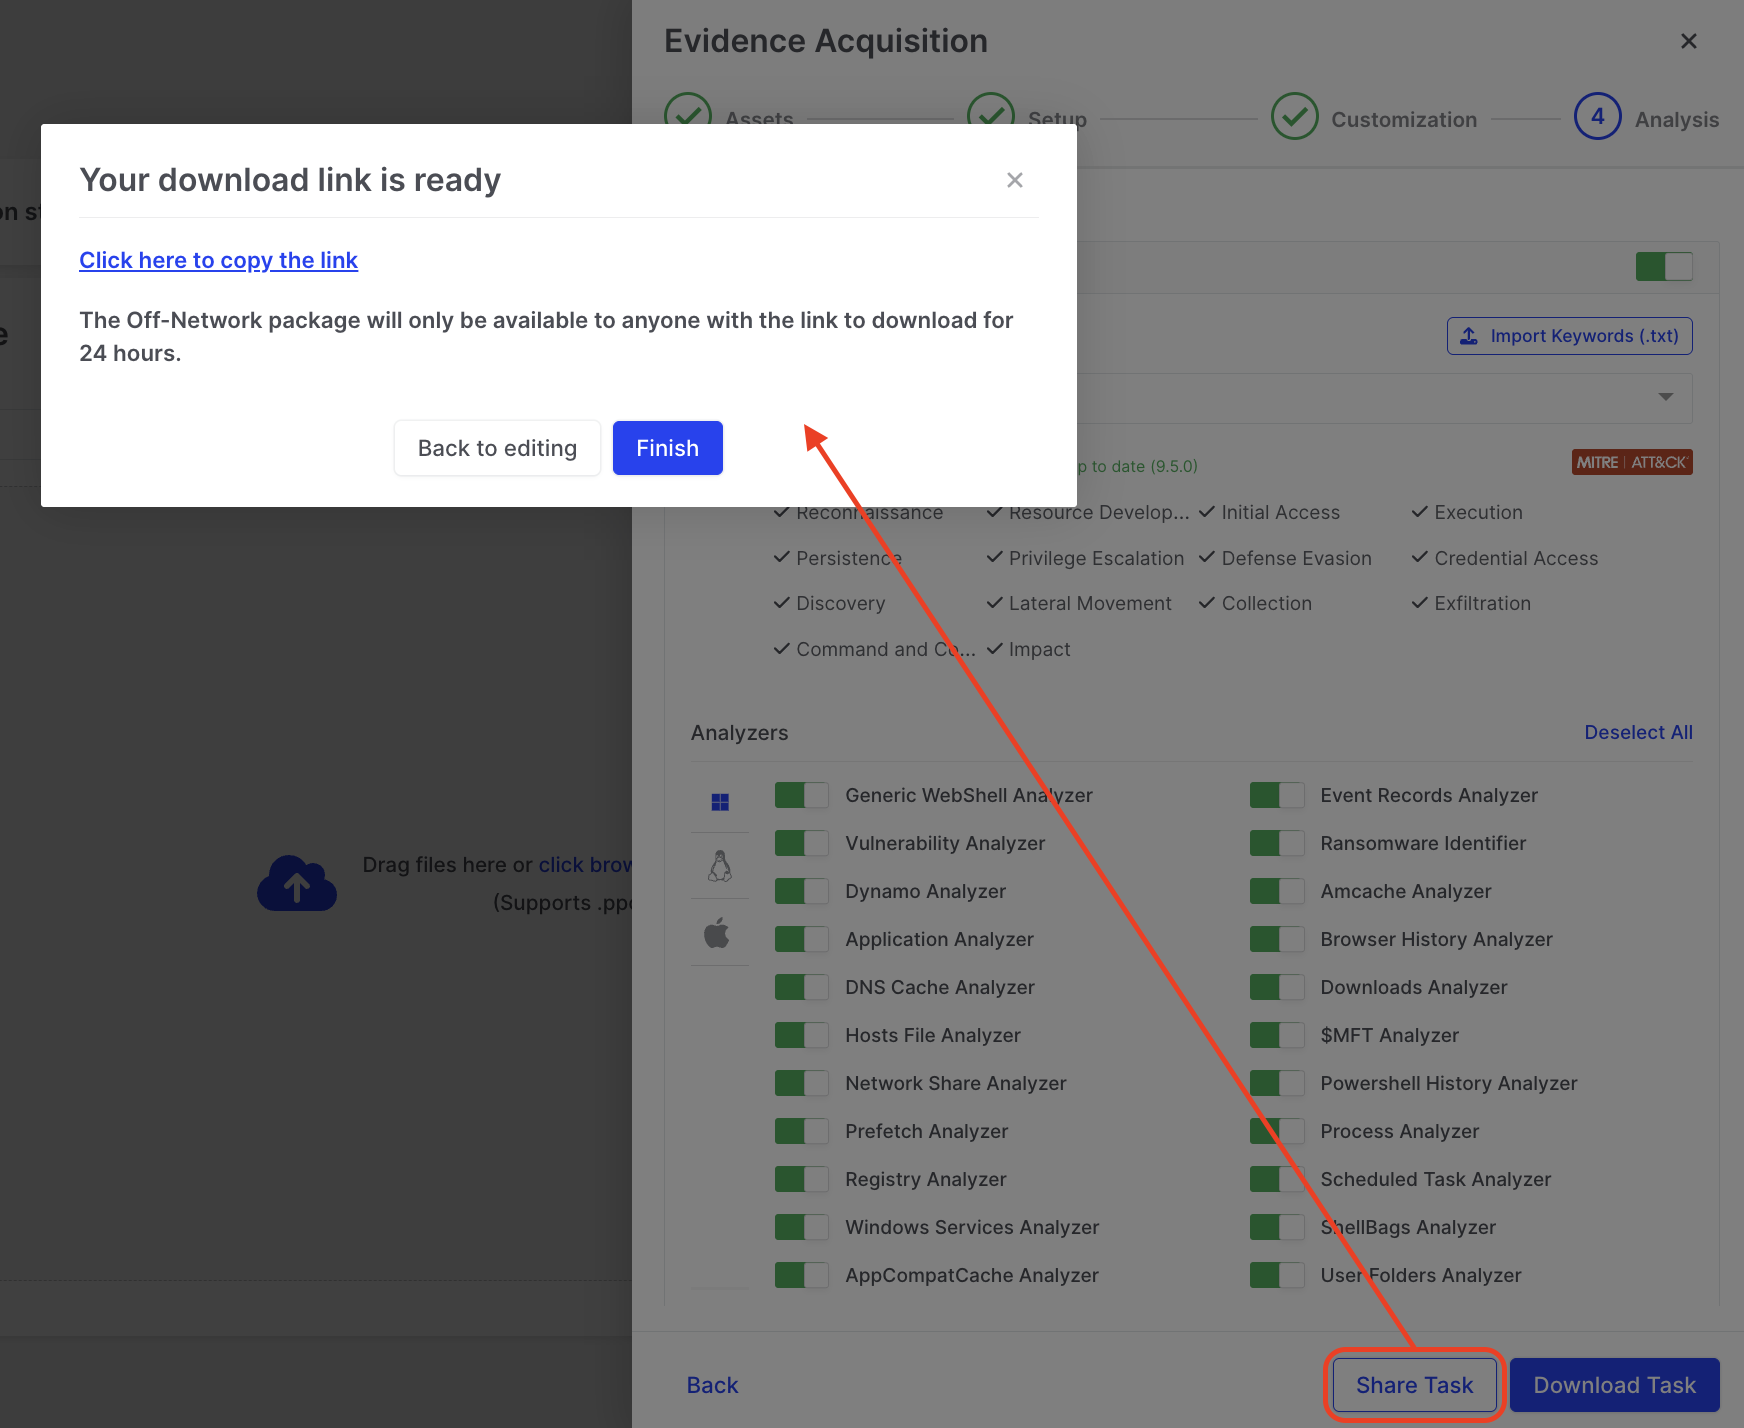
Download or Share the Responder Binary
Section titled “Download or Share the Responder Binary”You can now download or share the Responder binary you have just created.
You can access the Responder binary by either downloading it directly to your storage media or by copying the link to share the package.
Off-Network Responder: Download Link
2. Task Execution
Section titled “2. Task Execution”Execute on the Offline Asset
Section titled “Execute on the Offline Asset”Run the downloaded Responder binary on the relevant offline asset keeping the Task.dat file in the same directory. In the example below, we show the downloaded executable file named ‘offnetwork_windows_amd64.exe’ and the UAC window where the user will need to allow permissions for the XDR Forensics Responder to run.

Off-Network Responder: The downloaded binary
XDR Forensics will display its progress as seen below and notify the user when the activity is complete

Off-Network Responder: Progress displayed
Evidence Collection in Windows Recovery Environment (WinRE)
Section titled “Evidence Collection in Windows Recovery Environment (WinRE)”Off-network Responders can operate in offline mode within Windows Recovery Environment (WinRE) to collect evidence when systems cannot boot normally. This capability enables the extraction of registry hives, event logs, and file artifacts directly from non-operational assets without rebuilding the system or imaging the entire disk.
This feature helps analysts recover evidence from critical hosts after ransomware or system-level compromise, preserving evidence integrity before remediation. Running the off-network Responder from a bootable USB drive ensures the collection process remains isolated and forensically sound.
WinRE Runbook (Step-by-step)
Section titled “WinRE Runbook (Step-by-step)”The steps below assume you already have a bootable WinRE or Windows installation USB.
Step 1 - Prepare the WinRE USB
- On a clean workstation, open
SpearTip_Triage_Collector_WINRE.zip. - Copy the Windows responder files to a dedicated folder on the USB, for example:
E:\Binalyze\OFFNET-WINRE-Collector\ - Ensure these files are together in that folder:
offnetwork_windows_amd64.exeTask.datMitre.zipCollect.bat
Step 2 - Boot into WinRE and identify drives
- On the target endpoint, attach:
- WinRE/Windows installation USB
- Binalyze USB (if separate)
- Boot from the WinRE/Windows media and select: Repair your computer → Troubleshoot → Advanced options → Command Prompt.
- In Command Prompt, run:
Identify:diskpartlist volume
- The USB containing
offnetwork_windows_amd64.exe - The offline Windows system volume (for awareness only)
- The USB containing
- Note the drive letters (they can differ from the live OS), then exit:
exit
Step 3 - Run Off-Network Responder from WinRE
- Change to the Binalyze folder on the USB, for example:
E:cd \Binalyze\OFFNET-WINRE-Collector
- Confirm the files are present:
dir
- Run the responder:
Collect.bat
- If prompted, confirm execution. In WinRE the responder runs with sufficient privileges by default.
- Monitor progress (for example: “Collecting registry hives”, “Collecting event logs”).
- Wait for a clear completion message before closing the window or powering down.
On completion, the responder creates a Cases folder containing an encrypted evidence container (.zip or .ppc).
Step 4 - Secure and transfer the evidence
- In WinRE Command Prompt, confirm the evidence exists, for example:
You should see a file likecd E:\Binalyze\Casesdir
OFFNET-WINRE-[Hostname]-[Timestamp].zip. - Exit Command Prompt and shut down the endpoint.
- Remove the USBs and transport them to a host capable of uploading the evidence.
Import the Collected Data
Section titled “Import the Collected Data”- After the Responder completes its task, it creates a new folder named “Cases” in the directory where it was executed (or in the directory defined during Responder generation). Inside this folder, you’ll find the encrypted evidence container file (with a .zip extension).
- The user needs to copy or transfer the zip file so that it can be seen by and imported into the XDR Forensics console that generated it.
- Import the .zip or .ppc file into the XDR Forensics console that created the binary. You can tick Run DRONE Analysis during import to analyze the collection on the console—useful when the original acquisition was done without DRONE.
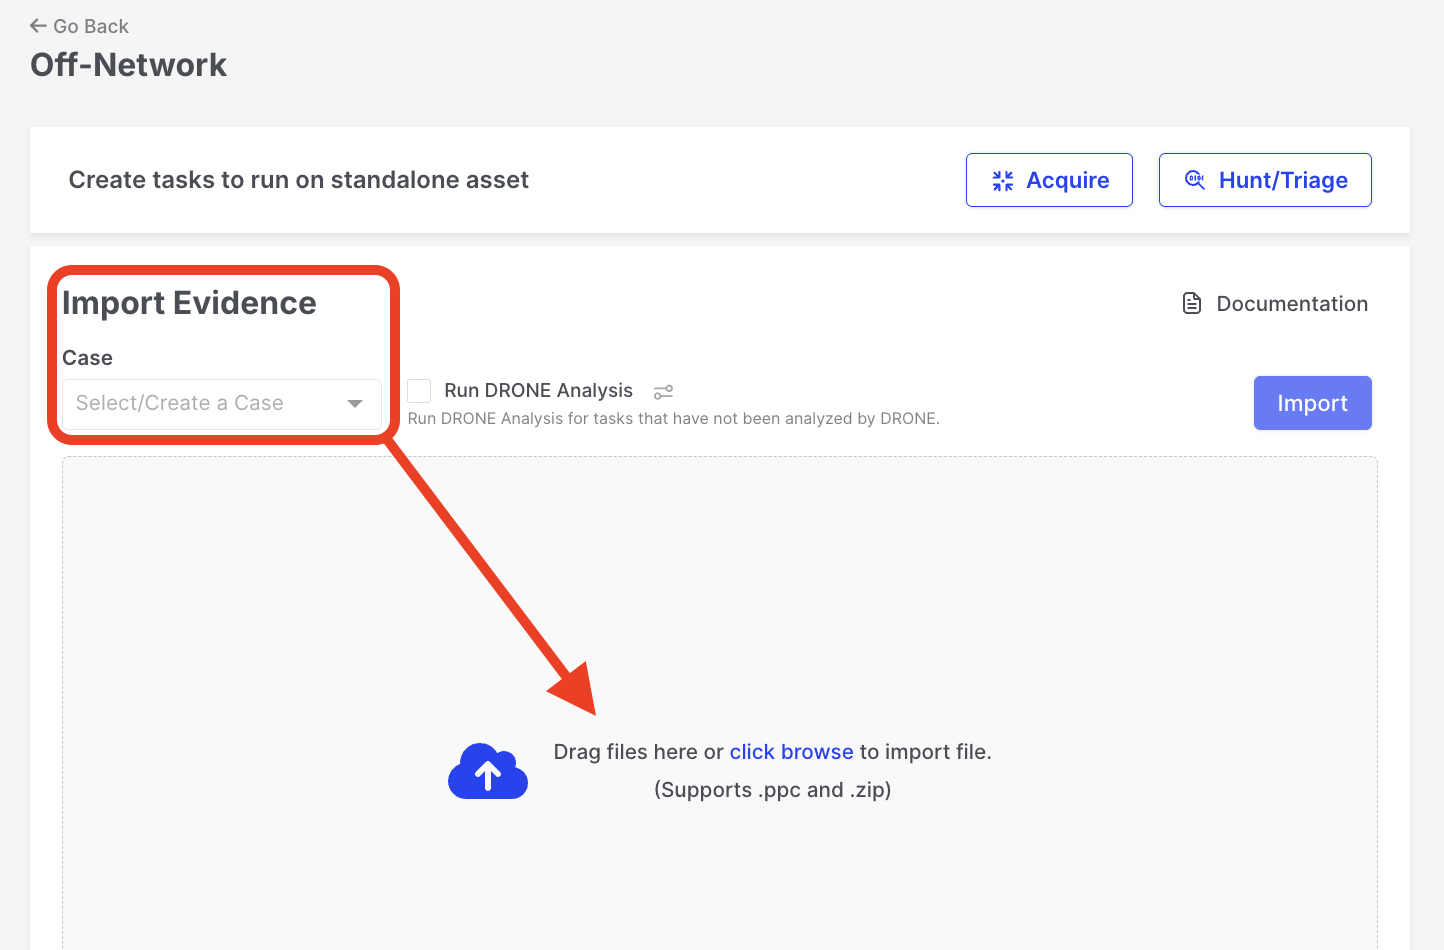
Off-Network Responder: Import Evidence
- If the user encrypted the collection with a password during the off-network task creation, enter the password when prompted during the import process.
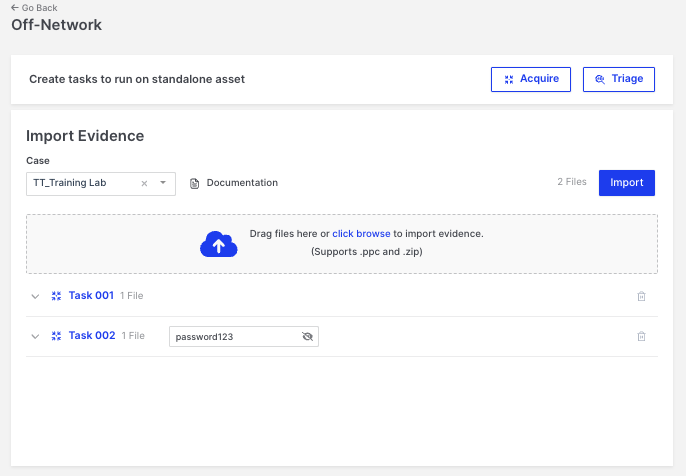
Off-Network Responder: Enter Password
In the example provided above, Task 001 is ready for import and will be automatically ingested by the console. However, for Task 002, the user must manually enter a password. This password is the one selected during the generation of the Responder binary as additional security to that automatically provided by XDR Forensics.
After clicking the “Import” button, as shown in the example above, the user is presented with another window, as illustrated below. Here, the decrypted zip file name is revealed, allowing the user to export the passwords used to unzip the containers containing the acquired data.
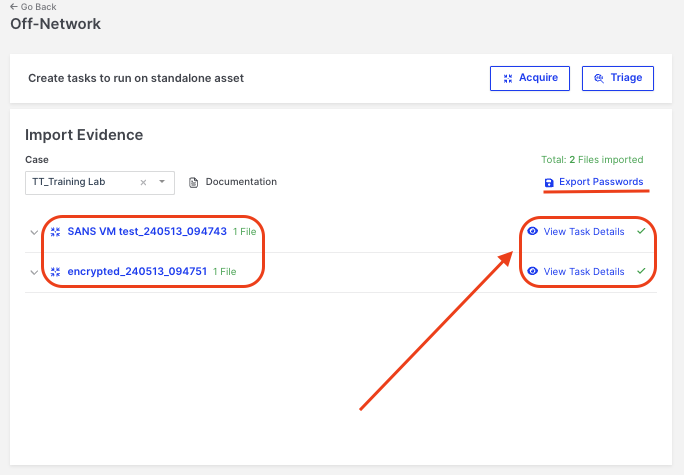
Off-Network Responder: View Task Details
Clicking the “View Task Details” icon will open the Task Details window. Here, users can copy the zip password needed to decrypt the container locally.
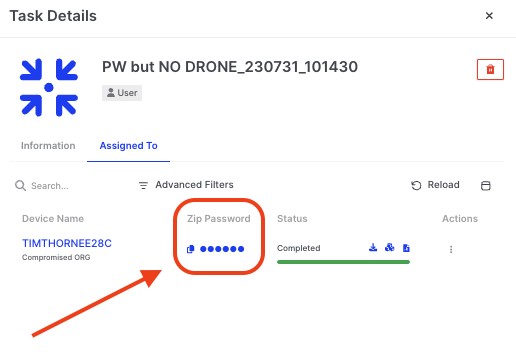
Off-Network Responder: Password Copy
Review Report on XDR Forensics Console
Section titled “Review Report on XDR Forensics Console”Once the imported data is decrypted into the console, users review and analyze the collected data in the XDR Forensics Investigation Hub.
biunzip